Hardwood floors are one of the most valuable features in any home. They look beautiful when well maintained, but they also require a more careful approach than tile or vinyl. The wrong product, too much water, or the wrong technique can cause swelling, warping, or permanent surface damage.
At Quality Clean Service, we care for hardwood floors in homes across Nantucket, Cape Cod, and Martha’s Vineyard regularly. In this guide, we share the best way to clean hardwood floors for both routine maintenance and deeper cleaning, with practical advice on products, tools, and common mistakes to avoid.
Why hardwood floors need special care
Hardwood is a natural material that responds to its environment. It expands when exposed to moisture and contracts when the air is dry. This sensitivity is what makes excess water the biggest risk during cleaning. Water that sits on hardwood seeps into the seams between planks and causes swelling, cupping, and eventually warping.
Additionally, hardwood finishes, whether polyurethane, oil-based, or wax, can be damaged by harsh chemicals. Using the wrong cleaner can strip the finish, leaving the wood underneath exposed and vulnerable.
Understanding these two risks shapes every step of the cleaning process described below.
What you need to clean hardwood floors
Gather your supplies before you start. Using the right tools protects the finish and makes the job faster.
For routine cleaning:
- Soft-bristled broom or dust mop
- Vacuum cleaner with a hard floor attachment (no beater bar)
- Microfiber mop
- pH-neutral hardwood floor cleaner
- Distilled or filtered water
For deeper cleaning or stain removal:
- Commercial hardwood floor cleaner (look for products specifically labeled for your finish type)
- Clean microfiber cloths
- Soft-bristled brush for spot cleaning
- White vinegar (diluted, for lightly soiled sealed floors only)
Products to avoid on hardwood floors:
- Steam mops: the heat and moisture penetrate the finish and cause long-term damage
- Wet mops or string mops: hold too much water
- Ammonia-based cleaners: strip the finish
- Undiluted vinegar: acid in high concentrations can dull the finish over time
- All-purpose cleaners not formulated for hardwood
- Oil soaps on polyurethane-finished floors: they leave a residue that builds up over time
Step 1: Dry dust or sweep the entire floor
The best way to clean hardwood floors always starts with removing dry debris. Dust, grit, and sand are highly abrasive. Dragging these particles across hardwood during mopping scratches the finish progressively, creating a dull, worn appearance over time.
Use a soft-bristled broom or a microfiber dust mop to sweep the entire floor. Work in the direction of the wood grain to push debris out of the seams rather than across them. Pay particular attention to corners, edges, and the areas under furniture where dust concentrates.
Alternatively, use a vacuum with a hard floor attachment. Make sure the beater bar is turned off or fully raised. The spinning brush of a standard vacuum attachment scratches hardwood finish with every pass.
Step 2: Identify your floor finish
Before applying any liquid cleaner, know what type of finish your floor has. This determines which products are safe and which ones will cause damage.
Surface-sealed floors (most common): Finished with polyurethane, polyacrylic, or urethane. These floors have a visible sheen and are the most tolerant of cleaning products. The finish sits on top of the wood rather than inside it. Most modern hardwood floors fall into this category.
Oil-treated or penetrating-finished floors: The finish soaks into the wood rather than sitting on top. These floors look more matte and natural but require oil-based or soap-based cleaners specifically designed for oil-treated wood.
Wax-finished floors: Older floors often have wax finishes. These are the most sensitive. Water and most commercial cleaners damage wax finishes. Wax-finished floors should be cleaned with a product specifically designed for wax or maintained with fresh wax application.
If you are unsure of your finish type, rub your finger firmly across the floor. If it leaves a smudge, the floor is wax-finished. If nothing happens, it is surface-sealed.
Step 3: Prepare your cleaning solution
For surface-sealed floors, use a pH-neutral hardwood floor cleaner diluted according to the product instructions. Products such as Bona Hardwood Floor Cleaner are formulated specifically for this purpose and evaporate quickly without leaving residue.
If you prefer a DIY solution for lightly soiled surface-sealed floors, mix a small amount of white vinegar with warm water, at roughly one quarter cup per gallon. Use this sparingly and avoid it on floors with worn or compromised finish, as repeated acid exposure can eventually dull the surface.
For oil-treated floors, use a product specifically recommended by the floor manufacturer or installer.
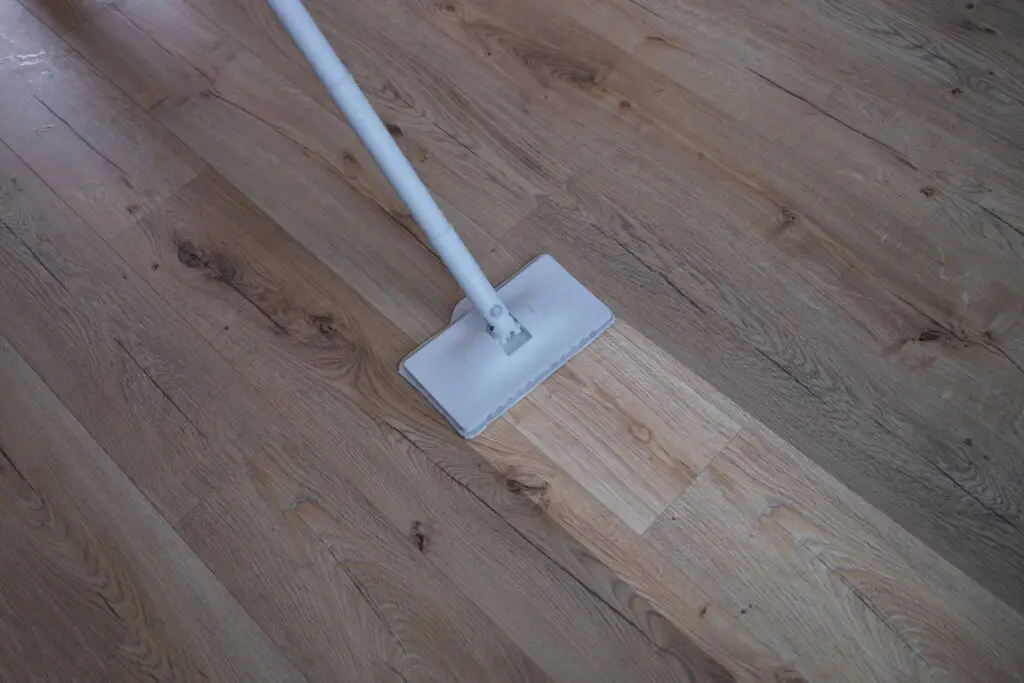
Wring your mop until it is barely damp before it touches the floor. This is critical. A mop that deposits visible moisture onto hardwood is too wet. The floor surface should look dry within seconds of contact.
Step 4: Mop in sections, working with the grain
Apply your cleaning solution to small sections of the floor at a time. Work in the direction of the wood grain, moving your mop in long, smooth strokes that follow the length of the planks.
Mop a section, then go back over it immediately with a second dry pass if any moisture is visible. You want the floor as dry as possible after each section.
Do not let water pool anywhere on the surface. Pay extra attention to the areas around sinks, dishwashers, and exterior doors, where water exposure is most common and floor swelling is most likely to occur.
Step 5: Spot clean stains immediately
For fresh spills, blot immediately with a clean, dry cloth. Do not rub. Rubbing spreads the liquid and pushes it into the seams.
For dried stains, dampen a microfiber cloth with your cleaning solution and place it directly over the stain. Let it sit for thirty seconds to rehydrate the stain, then rub gently in the direction of the grain.
Specific stain treatments:
Pet urine: Blot immediately and apply a hardwood-safe enzyme cleaner. Urine is highly damaging to hardwood if left to dry. It penetrates the finish and stains the wood itself. Address pet accidents within minutes whenever possible.
Scuff marks: Rub a clean tennis ball or a pencil eraser gently over the scuff. The mild friction removes most scuffs without affecting the finish.
Grease or oil: Apply a small amount of dish soap directly to a cloth and rub the spot gently, then wipe clean with a damp cloth and dry immediately.
Wax or crayon: Place a bag of ice over the spot to harden the material, then gently scrape with a plastic credit card. Clean any residue with a cloth dampened with your floor cleaner.
Step 6: Dry the floor completely
After mopping, allow the floor to dry completely before walking on it. In most conditions, this takes five to fifteen minutes. Use a fan or open windows to speed up drying if needed.
Do not place rugs, furniture, or floor mats back onto the floor until it is completely dry. Trapping moisture under a rug can cause localized swelling and finish damage.
In humid conditions, such as summer on Cape Cod or Nantucket, consider running a dehumidifier to keep indoor humidity below 55%. Consistently high humidity causes hardwood to expand and the floor boards to press against each other, eventually causing buckling.
Step 7: Protect your floors between cleanings
Regular protection extends the life of your hardwood floor finish significantly and reduces how often you need to do a full clean.
Use these protective practices consistently:
- Place felt pads under all furniture legs. Even lightweight furniture scratches hardwood finish when moved.
- Use doormats at all exterior entries to reduce dirt and grit tracked in from outside.
- Remove shoes at the door. Hard-soled shoes and high heels concentrate weight on small surface areas and dent wood fibers.
- Keep pet nails trimmed. Long nails scratch hardwood with every step.
- Maintain consistent indoor humidity between 35% and 55% year-round to minimize seasonal expansion and contraction.
How often should you clean hardwood floors?
The right frequency depends on foot traffic and lifestyle. Here is a general guide:
| Cleaning type | Frequency |
|---|---|
| Dry sweep or dust mop | Daily or every other day in high-traffic areas |
| Damp mop with cleaner | Weekly or every two weeks |
| Deep clean | Monthly |
| Professional refinishing | Every 7 to 10 years, depending on wear |
In homes with pets, children, or frequent guests, increase dry sweeping to daily and damp mopping to once a week. This prevents grit from building up and scratching the finish during normal foot traffic.
Our residential cleaning services include hardwood floor care as part of routine home cleaning across Nantucket, Martha’s Vineyard, and Cape Cod. You can also find additional room-by-room cleaning guidance in our house cleaning checklist.
The best way to clean hardwood floors: keep them looking their best with the right approach
The best way to clean hardwood floors combines the right tools, the right products, and consistent habits. Always start with dry sweeping, use a barely damp mop, clean in the direction of the grain, and dry the floor immediately after. Protect the finish with felt pads, doormats, and humidity control. These steps keep your hardwood floors looking beautiful for decades.
When your floors need professional attention or your schedule calls for regular help, Quality Clean Service is ready. We serve homeowners across Nantucket, Cape Cod, and Martha’s Vineyard with professional, eco-friendly residential cleaning. Contact us for a free quote today.