A bathroom that looks clean is not always a clean bathroom. The distinction matters because bathrooms are among the highest-risk rooms in a home for the kind of invisible buildup, mold growth, and pathogen accumulation that surface cleaning does not address. Soap scum, hard water deposits, mold in grout lines, bacterial contamination around toilet bases, and mildew inside silicone caulking all develop in the spaces that a weekly surface clean consistently skips.
A bathroom deep cleaning service addresses these areas systematically, not just the surfaces that are visible at a glance. This guide covers the complete step-by-step process, the specific tools and products required, the areas most often missed, and the frequency that makes sense for different property types. For coastal homes in Nantucket, Cape Cod, and Martha’s Vineyard, where humidity and salt air accelerate the conditions that make deep cleaning necessary, this knowledge is particularly practical.
What makes a bathroom deep clean different from regular cleaning
Routine bathroom cleaning, performed weekly or bi-weekly, covers:
- Toilet surface exterior and bowl interior
- Sink and faucet exterior
- Mirror
- Counter surfaces
- Floor sweep and mop
A bathroom deep cleaning service adds:
- Grout scrubbing between all tiles
- Caulking inspection and cleaning (or assessment for replacement)
- Showerhead descaling
- Drain stopper removal and cleaning
- Behind and around the toilet base
- Exhaust fan cover and interior
- Inside all cabinets and medicine cabinet
- Baseboard cleaning
- Window sill and track cleaning
- Shower door track or curtain rod cleaning
- Mineral deposit removal from all fixtures
The difference in time and effort is significant. The difference in result, in terms of hygiene, odor, and the prevention of mold and mildew spread, is substantial.
How often does a bathroom need deep cleaning?
The answer varies by property type and usage pattern.
Standard households with one to two occupants: every four to six weeks.
Families with children or multiple occupants: every three to four weeks. Higher usage accelerates soap scum, hair accumulation, and mineral deposit development.
Coastal homes in Nantucket, Cape Cod, and Martha’s Vineyard: every three to four weeks during any occupied period. Coastal humidity creates conditions for accelerated mold and mildew development. A bathroom that looks clean can have active mildew growth in grout and caulking that will spread without intervention.
Vacation rental properties: after every extended stay or at minimum every two weeks during peak season. Guest bathrooms in rental properties experience intensive use from people unfamiliar with the home, and the standards are higher because the condition of the bathroom is a primary driver of cleanliness reviews.
The Centers for Disease Control and Prevention notes that mold exposure in residential environments can cause respiratory symptoms, allergic reactions, and worsening of conditions like asthma. In bathrooms, which are consistently warm and moist, mold in grout and caulking is the most common source of ongoing spore exposure for home occupants.
Tools and products needed for bathroom deep cleaning
Gather everything before starting. Working without the right tools means either improvising with less effective substitutes or stopping mid-process to find something.
Tools:
- Stiff-bristle grout brush (dedicated to bathroom use)
- Old toothbrush (for detail work around faucet bases, caulking edges, and drain openings)
- Non-scratch scrubbing sponge
- Microfiber cloths (multiple: one for glass, one for general surfaces)
- Squeegee (for glass shower doors)
- Bucket
- Gloves
Products:
- Bathroom cleaner appropriate for tile and tub surfaces
- Toilet bowl cleaner
- Glass cleaner (streak-free)
- Grout cleaner or a paste of baking soda and water for moderate buildup
- Descaling product or white vinegar for mineral deposits (note: do not use vinegar on natural stone)
- Eco-friendly disinfectant for high-touch surfaces
- Drain cleaner or a mechanical drain snake for slow drains
For coastal homes and homes with pets or children: choose plant-derived or EPA Safer Choice certified products where possible. Bathroom cleaning involves products used in enclosed, often poorly-ventilated spaces, and the chemical exposure from bleach-heavy cleaners in those conditions is meaningful.
Step-by-step bathroom deep cleaning process
Step 1: Ventilate and clear the space
Open the window or turn on the exhaust fan before you begin. Many cleaning products require ventilation and produce fumes that are harmful in enclosed spaces.
Remove everything from counter surfaces, shower shelves, and inside the medicine cabinet and any under-sink storage. Cleaning around items means not cleaning under and behind them.
Step 2: Apply products and allow dwell time
Apply toilet bowl cleaner inside the toilet and allow it to sit for a minimum of 10 minutes. Apply bathroom cleaner to shower walls, tub surfaces, and tile. Allow these products to work: dwell time is what enables them to break down soap scum and mineral deposits without requiring abrasive scrubbing that can damage grout and tile.
For heavy mineral deposits on faucets and showerheads: fill a plastic bag with diluted descaling solution or white vinegar, tie it around the showerhead and faucet so the affected areas are submerged, and leave for 30 minutes to several hours depending on severity.
Step 3: Scrub the shower and tub
Starting at the top of the shower walls and working down: use a scrubbing sponge on smooth tile surfaces and a grout brush in grout lines. The grout lines between tiles are where mold and mildew establish themselves. A quick wipe with a sponge does not remove the growth; a stiff brush working along the grout line does.
Pay particular attention to:
- The caulking line between the tub and wall, or between the shower floor and walls: this is the highest-risk zone for mold in any bathroom
- The caulking around any built-in shelving or fixtures
- The shower floor surface or tub base, where soap residue accumulates in a way that is not always visible as dirt
- The shower door tracks if applicable
Rinse thoroughly with hot water after scrubbing. Squeegee glass shower doors from top to bottom.
Step 4: Address the showerhead and faucets
Remove the bag of descaling solution. Scrub the showerhead and faucet surfaces with an old toothbrush to remove loosened mineral deposits. Run hot water through the showerhead for 30 seconds. If flow is still restricted, the showerhead may need to be removed and its flow restrictor cleaned or replaced.
Mineral deposits on faucet bases and around the sink drain are often ignored during routine cleaning. An old toothbrush with a descaling product addresses these effectively.
Step 5: Clean the toilet completely
Scrub the interior of the bowl with a toilet brush, working under the rim where mineral deposits and bacterial buildup occur and where most people do not apply the brush.
For the exterior:
- Wipe the tank and lid
- Wipe the seat top, seat bottom, and underside of the lid
- Wipe the full exterior of the bowl
- Clean the area where the toilet base meets the floor: this is one of the most neglected areas in any bathroom and one of the most significant for hygiene
- Clean the floor directly around the base on all sides
Discard toilet brushes that have visible deterioration and replace every three to six months.
Step 6: Clean the sink and vanity completely
Spray cleaner on the sink basin and let it sit while you address other areas. Return to scrub the basin, faucet, and handles. Use a toothbrush around the faucet base, where mineral scale and soap residue accumulate invisibly.
Remove the drain stopper if it is accessible. Clean the drain stopper and the drain opening underneath. Drain stoppers accumulate hair and soap residue and are a source of odor even in bathrooms that are otherwise clean.
Wipe the full vanity counter, including the edges and the areas behind the faucet and around the basin rim. Spray and wipe all cabinet and drawer fronts. Open all cabinets and drawers and wipe the interior surfaces.
Step 7: Clean the exhaust fan
Remove the exhaust fan cover (typically clips or a single screw). Wash the cover in warm soapy water and dry. Use a vacuum hose attachment or a can of compressed air to clear dust from the fan interior. Replace the cover.
A bathroom exhaust fan that is clogged with dust does not effectively move air, which means it fails at its primary function of moisture removal. In coastal bathrooms where humidity is already elevated, this failure accelerates mold development.
Step 8: Clean all glass and mirrors
Apply glass cleaner to a microfiber cloth (not to the mirror directly, which allows cleaner to run behind the frame and cause moisture damage). Wipe in a consistent pattern: top to bottom in overlapping strokes. Check for streaks from multiple angles, including in raking light, before moving on.
Clean any other glass surfaces in the bathroom: shower doors (if not already squeegeed), any glass shelving, and window glass if present.
Step 9: Wipe all remaining surfaces
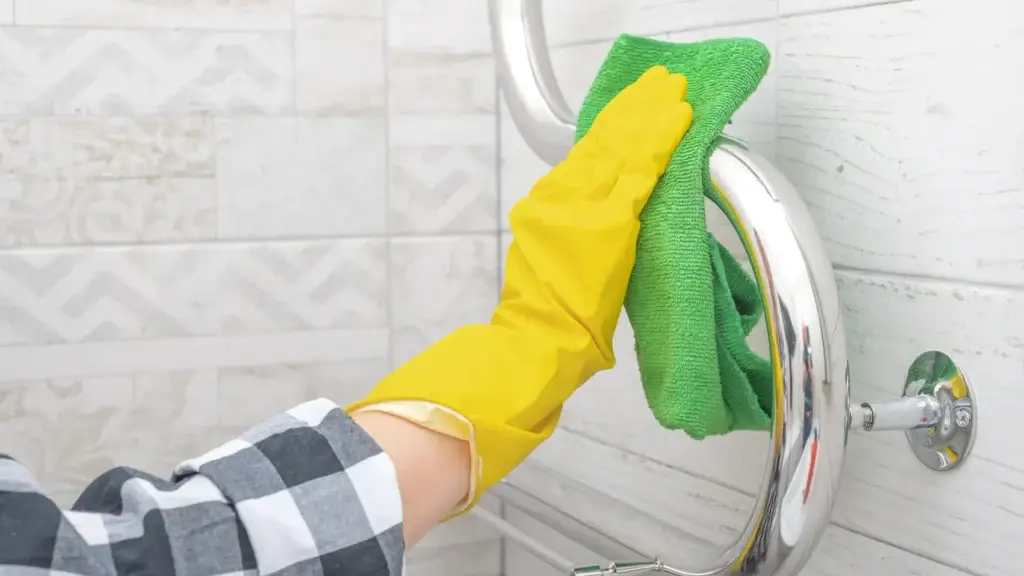
In sequence: light fixtures and covers (after ensuring lights are off and bulbs are cool), towel bars and rings, toilet paper holder, any wall-mounted accessories, window sill and window track, baseboards.
Baseboards in bathrooms accumulate moisture and hair along their top surface. Clean the top, face, and inside corner of every baseboard section.
Step 10: Clean the floor
Sweep or vacuum the floor to remove all debris before wet-cleaning. Pay attention to the corners and the narrow space behind the toilet. Hair and debris in these areas get embedded into the grout during mopping if not removed first.
Mop with an appropriate floor cleaner for the tile type. Grout is porous and absorbs cleaning product; ensure it is rinsed well to prevent residue buildup that attracts dirt.
Step 11: Restore the space
Return organized, clean items to their places. Replace towels with freshly laundered ones. Restock consumables. Leave the exhaust fan running for 15 to 30 minutes after cleaning to remove moisture from the products used.
Assessing caulking during deep cleaning
Every bathroom deep cleaning session should include an assessment of the caulking condition around the tub, shower, and any other sealed joints.
Caulking is an organic material that degrades over time. It absorbs moisture, develops mold, and eventually loses its seal. Mold on the surface of caulking can often be cleaned, but mold that has penetrated the caulk body (visible as black discoloration that does not scrub off) indicates that the caulking needs to be removed and replaced.
Replacing caulking is a straightforward DIY task in most cases: remove the old caulking with a utility knife and caulk remover tool, clean the surface thoroughly and allow to dry completely, and apply new caulk in a steady bead. Allow the full cure time specified on the product before exposing to water, typically 24 hours.
When to use a professional bathroom deep cleaning service
A professional service is the appropriate choice when:
- The bathroom has not been deep-cleaned in several months and requires a full-scope reset
- Grout discoloration indicates mold growth that requires sustained scrubbing with the right products and tools
- The property is a vacation rental preparing for a new season or recovering from an intensive booking period
- Physical limitations make scrubbing tubs, toilets, and floors difficult or painful
Professional bathroom deep cleaning service brings industrial-grade equipment, specific product knowledge, and the experience to assess and address problem areas that are not immediately apparent. For vacation rental operators, professional cleaning also provides documentation, typically a receipt or confirmation, that can support a cleaning deposit return or justify a higher cleaning fee.
If your bathroom has not had a proper deep clean in several months, book a bathroom deep cleaning service in Nantucket, Martha’s Vineyard, or Cape Cod and get it back to a starting baseline.
Frequently asked questions about bathroom deep cleaning
What is the most important area to focus on in a bathroom deep clean? Grout and caulking. These are the areas where mold and mildew establish themselves and where the health and hygiene implications of inadequate cleaning are most significant. A bathroom can look spotless with a standard clean while having active mold in grout and failing caulking that allows moisture into walls.
How do I remove black mold from bathroom grout? A commercial mold-killing grout cleaner or a paste of baking soda with hydrogen peroxide applied directly to the grout line, left for 10 to 15 minutes, then scrubbed with a grout brush and rinsed thoroughly will address surface mold effectively. If the discoloration returns quickly or does not fully remove, the mold has penetrated the grout and regrouting may be necessary.
How do I prevent mold from returning after deep cleaning? Consistent moisture control: run the exhaust fan during and for 15 minutes after every shower, wipe wet surfaces after use, and keep humidity below 55 percent. Spray a diluted tea tree oil solution (a natural antifungal) on grout and caulking monthly as a preventive measure. Address any caulking that shows early signs of deterioration before it allows moisture infiltration.
Is it safe to use bleach for bathroom deep cleaning? Bleach effectively kills mold and disinfects surfaces, but it requires significant ventilation, should not be mixed with other cleaners (particularly ammonia, which produces toxic gas), and is not appropriate for all bathroom surfaces. For regular use, particularly in homes with children or in enclosed bathrooms with limited ventilation, EPA Safer Choice certified disinfectants are a preferable alternative.
Thorough cleaning is preventive maintenance
A bathroom deep cleaning service is not luxury maintenance. It is preventive work that stops the progression of mold, mineral damage, and grout deterioration that are significantly more expensive to address once they reach a structural stage. The investment in thorough, regular deep cleaning is returned in lower long-term repair costs and, for rental properties, in the review ratings that drive booking income.
Mold in grout, failing caulking, and mineral buildup are preventable if they are caught and addressed on the right schedule. Request a bathroom deep cleaning service quote and stop the buildup before it becomes a structural problem.