
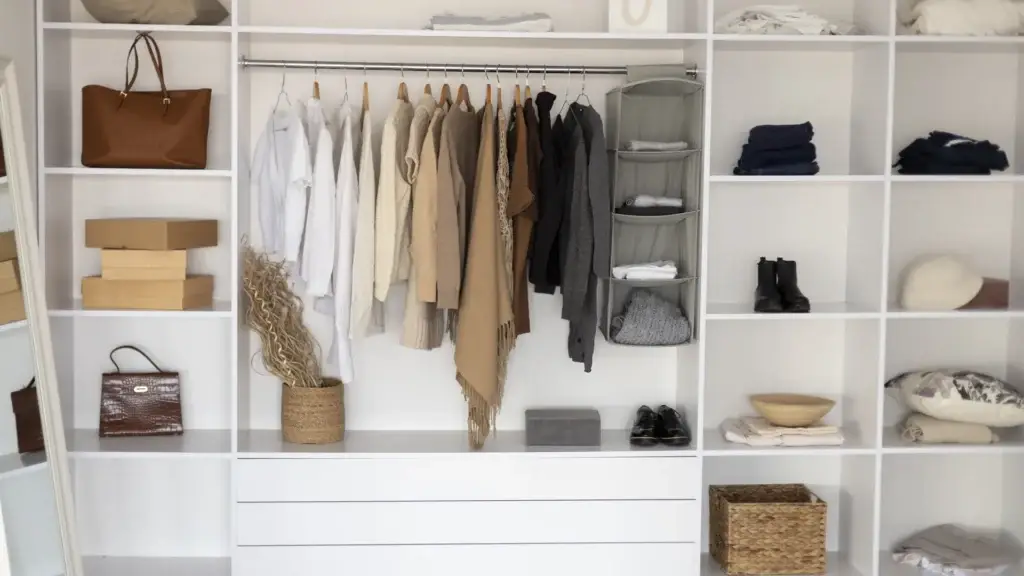
A disorganized closet is not just a visual problem. It slows down your morning, causes daily friction, and makes it harder to know what you own. Most closet organization attempts fail within a month because they skip the two steps that make the result permanent: reducing volume before organizing, and designing the system around how the space is actually used.
These tips are ordered by impact. Start with the ones at the top.
Why most closet organization fails
The most common mistake is organizing without editing first. If you sort and contain items that should not be there, you are building a system on top of excess. It will look better for a few weeks and then drift back.
The second mistake is organizing for the ideal version of how you would like to use the space, not how you actually use it. A system that requires perfect folding technique or identical spacing to function will fail the first busy week.
Good closet organization works even on a rushed morning with no effort.
Step 1: edit before you organize
Pull everything out and sort into three piles: keep, donate, and discard.
The question that produces results is not “will I ever use this?” Almost anything could theoretically be used. The right question is: “Did I wear this in the past 12 months, and would I notice if it were gone?”
If both answers are no, it leaves.
Process donations immediately. Bags in the car or at the door, not in a corner “to deal with later.” Items that go back into the pile return to the closet.
Signs an item should go:
- You have not worn it in over a year
- It does not fit correctly right now
- You own a better version of the same thing
- It is kept out of guilt, not use
Reducing volume by 30 to 40 percent is more effective than any storage product.
Step 2: sort by category, not by outfit
Organizing by outfit (work clothes together, weekend clothes together) seems logical until you add something new or stop wearing a specific combination. The category shifts and the system breaks.
Sort by item type instead: all trousers together, all shirts together, all dresses together. Within each category, sort by color or by frequency of use, with the most-used items at eye level and easy reach.
This structure is stable. Categories do not change when your wardrobe does.
Step 3: use the full vertical height
Most closets are underused above the main hanging rod. The space from the rod to the ceiling is accessible storage that most people leave empty.
Options:
- A second hanging rod below the primary one for shorter items like shirts and jackets. This effectively doubles hanging capacity for those categories.
- A shelf above the primary rod for folded items, bags, hat boxes, and seasonal items in labeled bins.
- A full-height shelf unit on any open wall in a walk-in closet.
The floor below hanging items also gets wasted. A low shoe rack, a set of stacking drawers for folded items, or labeled bins use this space without creating clutter.
Step 4: standardize hangers
Mixed hanger types waste horizontal space, cause items to sit at different heights, and create visual noise that makes the closet harder to scan quickly.
Switch to one hanger style: slim velvet hangers for most clothing. They are non-slip, which prevents items from falling in high-humidity coastal environments, and narrow, which recovers 20 to 30 percent of hanging capacity in a full closet.
Keep specific hangers for suits, heavy coats, and trousers with a bar. Everything else on the same hanger type.
Step 5: contain non-hanging items
Folded items, accessories, and smaller pieces do not organize well on open shelves. They need contained storage.
Effective options:
- Drawer units inside the closet, either standalone or built-in, for t-shirts, underwear, socks, and anything that does not hang
- Fabric bins or canvas boxes on shelves for accessories, seasonal items, or grouped categories
- Clear shoe boxes or an open shoe rack for footwear, so you can see what you own without opening boxes
- Labeled bins on upper shelves for seasonal items that rotate in and out
In coastal homes on Nantucket, Martha’s Vineyard, and Cape Cod, where summer and winter wardrobes are genuinely different, vacuum storage bags for off-season bulky items free significant space during the months you do not need them.
Step 6: label everything
Labels are what turn a reorganization session into a system that holds.
When every storage location has a label, items return to the correct place without thinking. This matters most in households with multiple users, in vacation properties where different family members use the space across a season, and in any situation where someone other than the person who organized the closet needs to put something away.
A label maker produces clean results. Tape and a marker works equally well. The content matters, not the format.
Step 7: plan for seasonal rotation
In properties with a strong seasonal cycle, the closet should hold the clothes you are wearing right now. Off-season clothing should be stored elsewhere: a secondary closet, under-bed storage, or vacuum bags on upper shelves.
Plan the rotation as a specific task twice a year. When you pull out stored items, that is also the moment to edit. Anything you did not miss during the off-season is a strong candidate for donation.
For island properties in Nantucket or Martha’s Vineyard, a third category often exists: items that stay at the property year-round. These belong in a dedicated zone separate from the rotating seasonal wardrobe.
What professional organizers find in most coastal home closets
Professional organizing teams working in vacation homes and seasonal properties on Nantucket, Martha’s Vineyard, and Cape Cod encounter similar patterns consistently.
Closets in properties used by multiple family members across a season tend to have the most layered disorder: items from different people’s stays overlapping, seasonal clothing mixed with year-round items, and storage that made sense to the first person to use the space but communicates nothing to anyone else.
Walk-in closets in older properties frequently have a single high rod and nothing else, leaving the lower two-thirds of the closet’s vertical space completely unused. Adding a second rod for shorter items, a low shelf unit, and a few labeled bins transforms the usable capacity without any structural modification.
Shoe storage is a consistent problem area. Most closets have shoes on the floor in whatever arrangement resulted from the last time someone removed or replaced a pair. Once the closet is edited and all shoes are visible on an organized rack or in clear boxes, it is common for clients to discover they own three or four pairs of the same style in slightly different colors because the existing pairs were not visible.
Accessories, particularly bags, belts, and scarves, are another common discovery: not because people own too many, but because they are stored in ways that make them invisible and therefore not used. A clear bin on a shelf or a hook system inside the door door puts them back in circulation.
The consistent finding across most engagements: the editing step removes more than expected, and the resulting space, organized with category-based storage and labels, functions better than the original even when it was physically larger.
The weekly five-minute reset
No system maintains itself with zero effort. The goal is a system where maintenance takes five minutes, not an hour.
Once a week, return items that drifted to wrong locations, hang anything draped over the closet door or a chair, and do a visual scan for anything misplaced.
This habit is what separates a closet that stays organized from one that returns to disorder within a month of a reorganization session.
Common closet organization mistakes
- Organizing without editing first: the volume stays the same, only the arrangement changes
- Buying storage products before editing: you are buying containers for things that should not be there
- Sorting by outfit instead of category: unstable system that breaks when the wardrobe changes
- No labels: the system relies on memory, which fails under pressure
- Ignoring vertical space: most closets have 40 to 60 percent of their usable storage above and below the main hanging zone
When professional organizing makes sense
Some closets have genuine design problems. The space is undersized for the storage need, the layout does not match how the household uses it, or years of layered systems have produced a configuration that no simple reorganization fixes.
A professional organizer assesses the actual constraints, the household’s real storage needs, and the use patterns the system has to serve. The result is built around how the space is used, not how it should theoretically work.
This is particularly useful in vacation homes with shared closets, in historic properties with non-standard configurations, and in any situation where previous self-directed attempts have not held. The professional organizing service page covers what a full assessment and implementation includes.
FAQ: closet organization
How do I organize a small closet with limited space? Maximize vertical use first: add a second hanging rod for shorter items, install a shelf above the primary rod, add hooks to the inside of the door, and use the floor with a low shoe rack or stacking bins. Then edit aggressively so only the most-used items occupy the prime accessible zone.
What is the best way to store shoes in a closet? Visibility is the priority. If you cannot see the shoes, you will not wear them. Open shoe racks at floor level, clear shoe boxes on shelves, or an over-door organizer all work. The specific format matters less than whether you can see the full collection at a glance.
How do I keep a shared closet organized when my partner has different habits? Assign clearly separated zones. Each person’s zone follows their own organization approach. The negotiated commitment is that items return to their own zone, not anywhere in the closet. Labels on shared shelving reinforce this even when habits differ.
What should stay in a closet versus be stored elsewhere? The closet should hold current-season clothing and everyday accessories. Items accessed less than once a month (off-season clothing, special occasion pieces, storage items) should move to a secondary location and free up prime closet space for what you actually use daily.
How long does a professional closet organizing session take? A single bedroom closet typically takes two to four hours with a professional team, including the edit, system design, and implementation. Walk-in closets or shared closets in larger homes may take a full day. Homes that also need decluttering in other rooms are usually handled room by room across a single visit.
A closet that works on your worst morning
The standard for good closet organization is not how the space looks on a calm Sunday. It is whether it functions on a rushed weekday when you have ten minutes to get ready. A system built on those terms, with edited volume, consistent categories, and labeled storage, is one that will still be working six months from now.
If your closet has been reorganized before and drifted back to the same state within a month, the problem is the system, not you. Request a closet organization consultation in Nantucket, Martha’s Vineyard, or Cape Cod and get a design that accounts for how your household actually uses the space.
