
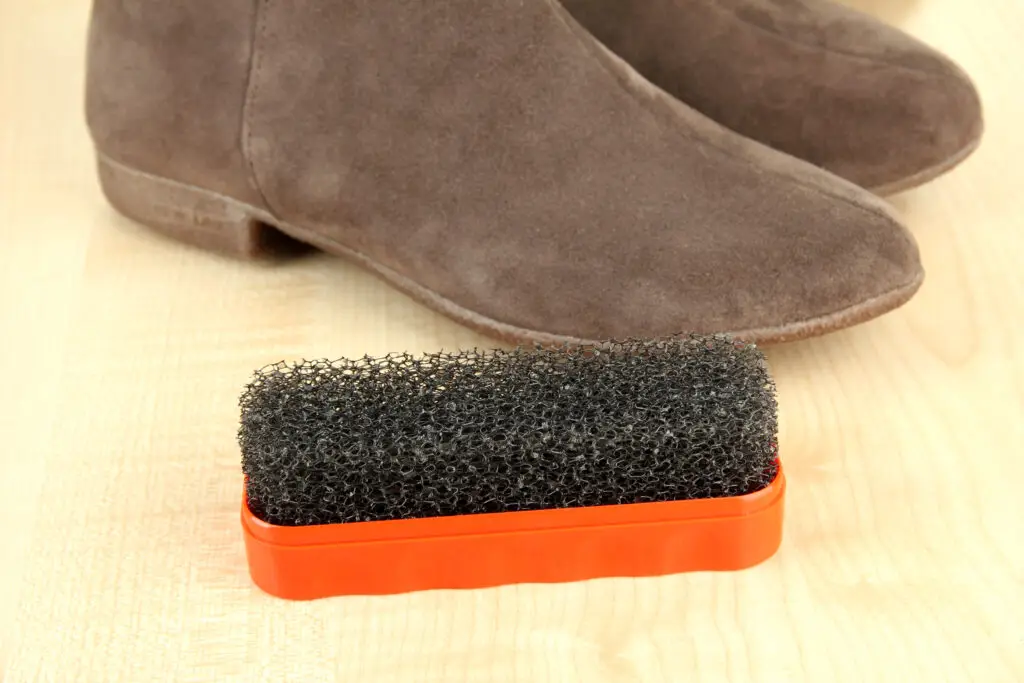
Suede shoes add a touch of elegance and style to any outfit, but their delicate, napped surface can easily pick up dirt, dust, and stains. While suede might seem intimidating to clean, with the right gentle techniques and common household items, you can effectively remove most blemishes and restore your shoes’ pristine look. This guide will walk you through DIY methods for cleaning suede shoes, helping you keep them looking their best.
Removing dirt: Brushing with stiff nylon brush or eraser
The first step in cleaning suede is always to remove any dry, loose dirt and debris. This prevents you from rubbing the dirt deeper into the nap.
- Suede Brush (Stiff Nylon Brush): This is your primary tool for suede care. A dedicated suede brush typically has stiff nylon bristles on one side and sometimes rubber nubs or a brass wire brush on the other.
- How to use: Gently brush the entire shoe in one direction (with the nap) to remove loose dirt and dust. For more stubborn, dried-on mud or grime, you can brush more firmly, but still in one direction, to lift the particles.
- Purpose: The bristles lift the nap, dislodging dirt and restoring the texture.
- Suede Eraser or Pencil Eraser: For scuffs, marks, or dried-on spots that brushing alone can’t remove, a suede eraser (or a clean, white pencil eraser for small marks) is highly effective.
- How to use: Gently rub the eraser back and forth over the scuff or mark, just like you would erase a pencil mark on paper. The friction helps lift the dirt.
- Purpose: The eraser material gently abrades the surface, lifting away embedded dirt without damaging the suede.
- Dry Cloth: For very light dust, a clean, dry microfiber cloth can also be used for a quick wipe.
Spot cleaning with vinegar or rubbing alcohol
For liquid stains, oil marks, or more stubborn spots, a gentle spot-cleaning approach with common household liquids can work wonders. Always test any solution on an inconspicuous area first.
- White Vinegar (for water spots, salt stains, general grime):
- Why it works: The mild acidity of white vinegar helps to break down mineral deposits from water and can lift various stains without discoloring the suede.
- How to use: Lightly dampen a clean white cloth (never colored!) with distilled white vinegar. Gently blot the stained area. Do not rub vigorously. You’ll want to dampen the entire affected panel of the shoe to avoid creating a new “water ring” from the vinegar itself.
- Aftercare: Once the stain is lifted, blot with a dry part of the cloth. Allow the shoe to air dry completely. Once dry, use your suede brush to restore the nap.
- Rubbing Alcohol (Isopropyl Alcohol) (for oil, grease, ink, stubborn marks):
- Why it works: Alcohol is excellent at dissolving oils, greases, and many types of ink, and it evaporates quickly, minimizing water damage.
- How to use: Dampen a clean white cotton ball or cloth with 70% isopropyl rubbing alcohol. Gently dab or blot the stain. For tougher spots, you can gently rub in one direction.
- Aftercare: Blot with a dry cloth. Allow to air dry. Once dry, brush the nap with your suede brush.
- Important Testing Tip: Before applying any liquid to a visible area, always test it on a small, hidden spot (e.g., inside the tongue or a less visible side) to ensure it doesn’t cause discoloration or damage to your specific suede.
Refreshing with suede protector spray
Once your suede shoes are clean and dry, applying a protector spray is a crucial step for ongoing maintenance and preventing future damage.
- Purpose: Suede protector sprays create an invisible barrier on the surface of the suede. This barrier helps to repel water, oil, and other liquids, making it much harder for stains to penetrate the delicate fibers. It also makes future cleaning easier.
- How to use:
- Ensure Cleanliness: Make sure your shoes are completely clean and dry before applying the spray. Any dirt or moisture will be sealed in.
- Ventilated Area: Work in a well-ventilated area, ideally outdoors, as these sprays can have strong fumes.
- Even Coat: Hold the can about 6-8 inches away from the shoe and spray in a light, even coat, covering the entire suede surface. Avoid oversaturating.
- Dry Time: Allow the shoes to dry completely (check product instructions for specific times, usually 30 minutes to a few hours).
- Second Coat (Optional): For extra protection, apply a second light coat after the first has dried.
- Reapply Regularly: Protector sprays are not permanent. Reapply them periodically (e.g., every few months or after a deep clean) to maintain protection, especially if you wear the shoes frequently or in inclement weather.
Avoiding water damage and stiffness
Water is suede’s worst enemy. Improper drying or excessive wetting can lead to permanent damage and stiffness.
- Avoid Direct Water Exposure: Suede is highly susceptible to water damage. Even a light rain can leave permanent water spots or alter the texture. Always try to avoid wearing suede shoes in wet conditions.
- If Wet, Dry Properly:
- Blot Immediately: If your suede shoes get wet, immediately blot away as much excess water as possible with a clean, dry towel.
- Stuff with Paper: Stuff the shoes with crumpled newspaper or paper towels to help absorb internal moisture and maintain their shape as they dry. Change the paper periodically if it becomes saturated.
- Air Dry Naturally: Allow the shoes to air dry completely at room temperature, away from direct heat sources (like radiators, hair dryers, or direct sunlight). Heat can cause suede to shrink, crack, or become stiff.
- Restore Nap: Once completely dry, use your suede brush to gently brush the nap back and forth, restoring its soft texture and flexibility.
- Preventing Stiffness: Stiffness often occurs when suede dries incorrectly or is exposed to too much moisture. Proper air drying and brushing are key. If your suede does become stiff, gently work it with your hands and brush it to try and restore some flexibility.
When to use a professional shoe cleaning service
While DIY methods are effective for many common issues, some suede cleaning challenges are best left to the experts.
- Deeply Set Stains: If a stain has been on the suede for a long time, has penetrated deeply, or is from a particularly difficult substance (like oil, paint, or dyes), professional cleaners have specialized tools and solutions that can often remove what home remedies cannot.
- Extensive Water Damage: If your suede shoes have been heavily soaked and have become stiff, discolored, or severely misshapen, a professional might be able to restore them more effectively than DIY attempts.
- Overall Grime and Wear: If your shoes are generally dirty, dull, or show significant wear across the entire surface, a professional cleaning can revitalize them uniformly.
- Delicate or Expensive Suede: For high-value or particularly delicate suede shoes, entrusting them to a professional minimizes the risk of accidental damage.
- Mold or Mildew: If you notice any signs of mold or mildew growth on your suede, it’s best to consult a professional. These issues require specialized treatment to ensure complete removal and prevent recurrence.
- Specialized Treatments: Professional shoe cleaning services often offer specialized treatments like re-dyeing, re-napping, or advanced conditioning that can restore suede to a near-new condition.
Keep your suede shoes looking their best with these gentle yet effective DIY cleaning techniques. For those challenging stains or when your favorite pair needs a complete refresh, remember that expert care is available.
Ready to give your suede shoes the professional treatment they deserve? Contact Quality Cleaning Services today for a free estimate on our specialized shoe cleaning services!
