
A disorganized kitchen makes everything harder. Cooking takes longer, cleaning is more frustrating, and you end up buying duplicates of things you already own but cannot find.
The good news is that you do not need to renovate or buy expensive storage solutions to fix this. You need a clear process. These eight steps show you how to organize the kitchen in a way that is practical, sustainable, and built around how you actually cook.
Quick answer
How do you organize the kitchen?
- Empty every cabinet, drawer, and pantry shelf completely.
- Declutter: keep only what you use, discard the rest.
- Group items by function (cooking tools, bakeware, pantry items, etc.).
- Assign zones based on how you cook (cooking zone, prep zone, cleanup zone).
- Choose storage solutions that fit your actual items.
- Return items to their zones, with the most-used ones most accessible.
- Declutter the countertop: keep only daily-use items out.
- Build two simple maintenance habits to keep the system working.
Why most kitchen organization attempts fail
Most people approach kitchen organization as a one-day project: pull things out, buy some bins, put things back. It looks good for a week or two. Then the clutter returns.
The problem is not motivation. It is method. Without a system built around your actual habits, storage fills up randomly, and items end up wherever there is space.
Professional organizers who work in homes regularly see the same pattern: the kitchen looks organized, but the system does not match how the household cooks. The knife block is far from the cutting board. The spices are in a different cabinet from the stove. The baking supplies are spread across three shelves. Every task takes a few extra steps, and those steps add up over the course of a day.
Lasting organization starts by understanding the workflow and designing the storage around it.
Step 1: Empty everything first
The first step in how to organize the kitchen is to start from scratch. Pull every item out of every cabinet, drawer, and pantry shelf. Place everything on the counter, the table, and the floor if needed.
This step is uncomfortable because it shows how much has accumulated. That is exactly the point. You cannot build a functional system around clutter you have not evaluated.
If doing the entire kitchen at once feels too disruptive, work in zones. Start with the pantry or one cabinet cluster. Finish that area completely before moving to the next.
Step 2: Declutter before you organize the kitchen any further
With everything out, make a firm decision about each item: keep, donate, or discard. Do not create a “maybe” pile. Items in the maybe pile always end up back in the cabinet, unchanged.
Ask yourself these four questions for each item:
- Have I used this in the past six months?
- Does it work properly?
- Do I already have a duplicate?
- Does this actually belong in the kitchen?
Be especially honest about small appliances and specialty gadgets. A pasta maker used once two years ago occupies the same cabinet space as items you use every week. That trade-off has a real cost.
Also discard:
- Pantry items past their expiration date
- Spices older than one year (they lose potency and take up prime space)
- Anything with a broken part, damaged seal, or missing lid
- Items that drifted into the kitchen from other rooms
This step is the one most people skip or rush. It is also the step that makes everything else work.
Step 3: Group items by function
Before anything goes back into a cabinet, group your items into functional categories. This is the foundation for your zone system.
Common categories for most kitchens:
- Cooking tools: spatulas, tongs, ladles, whisks, wooden spoons
- Pots and pans
- Bakeware: baking sheets, molds, cooling racks, rolling pins
- Cutting boards and knives
- Mixing bowls and measuring tools
- Plates, bowls, and serving dishes
- Glasses and mugs
- Food storage containers and lids
- Dry and canned pantry items
- Spices and oils
- Cleaning supplies
- Rarely used or seasonal items
Once you see your categories clearly, you can assign each one a logical location based on where and how you use them.
Step 4: Assign zones to organize the kitchen around your workflow
The most effective kitchens are organized around workflow, not aesthetics. Items you use most often should require the least effort to reach. Items used rarely should live in the least accessible spaces.
Here are the standard zones and what belongs in each:
Cooking zone (near the stove): Pots, pans, cooking tools, oils, and everyday spices. Keep these within arm’s reach of where you cook. Every step away from the stove during cooking adds friction.
Prep zone (near the countertop and cutting board): Knives, cutting boards, mixing bowls, measuring cups, colanders, and peelers. These should be exactly where you prepare food, not three cabinets away.
Baking zone (if applicable): Group all baking supplies together in one area. Flour, sugar, baking soda, baking powder, mixing bowls, and baking sheets all belong together. If you bake regularly, dedicate one full cabinet section or a pantry shelf to this zone.
Pantry and dry storage zone: Canned goods, dry goods, and cooking staples organized by category and frequency of use. The USDA recommends storing dry foods at around 70°F in clean, well-ventilated areas to maintain quality and safety, so pantry storage away from heat sources like the oven or dishwasher is always the better choice.
Cleanup zone (near the sink and dishwasher): Dish soap, sponges, drying rack, and cleaning supplies. Storing these near the sink is obvious but often ignored. Many kitchens keep cleaning supplies in a cabinet across the room.
Rarely used zone (upper cabinets, high shelves): Large platters, seasonal serving pieces, specialty appliances used only occasionally. Out of the way, but still findable.
Step 5: Choose the right storage solutions
Only shop for organizers after you know exactly what you need to store and where. Buying bins and dividers first is the most common and expensive mistake in kitchen organization.
Measure your cabinets and shelves before purchasing anything. Then look for solutions that fit what you actually have.
What works well in most kitchens:
Drawer dividers: Essential for the utensil drawer. Without them, drawers become unusable within days. Bamboo or adjustable plastic grid dividers keep items separated and visible.
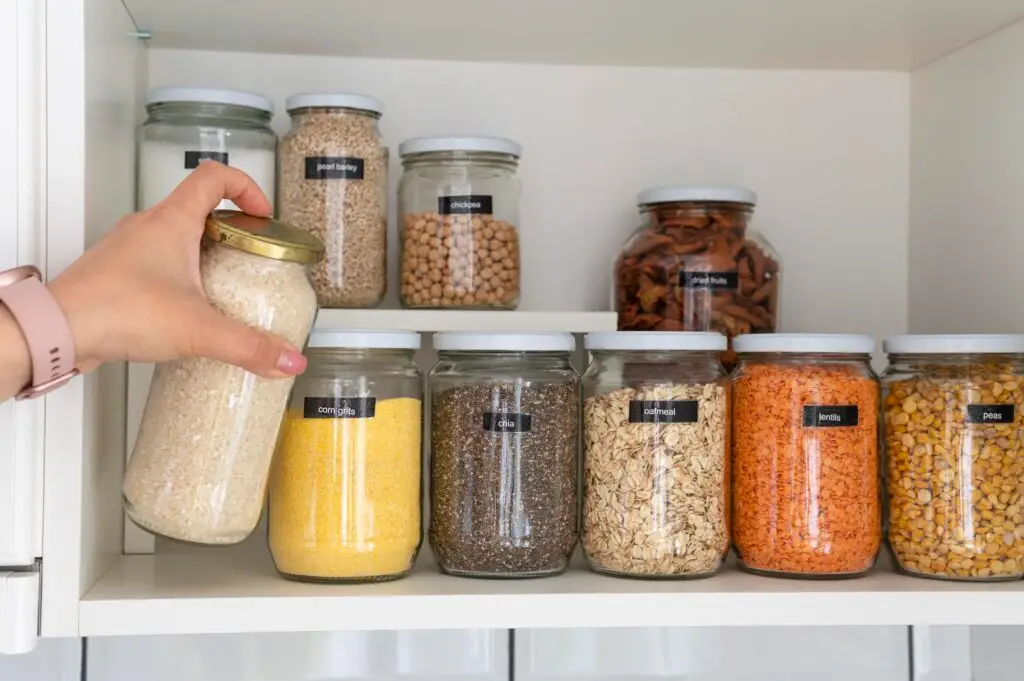
Clear, airtight containers for the pantry: Transfer dry goods like pasta, rice, flour, oats, and cereals into clear containers with airtight lids. Label each one. You will see what you have at a glance, reduce food waste, and extend shelf life.
Cabinet shelf risers: These double the usable vertical space inside most cabinets. Use them to stack plates, cans, or spices without burying items underneath.
Pot lid organizer: Lids are consistently the most disorganized item in a kitchen. A vertical rack or a dedicated drawer insert for lids solves this immediately.
Lazy Susan for corner cabinets: Rotating turntables make corner cabinet contents accessible without pulling everything out to reach the item in the back.
Magnetic knife strip: A strip mounted on the wall or inside a cabinet door keeps knives visible, accessible, and off the counter. It also frees up a full drawer.
Over-door hooks: The inside of cabinet doors is often completely unused. Hooks or small racks there can hold measuring spoons, graters, bag clips, and other flat tools.
Step 6: Return items to their zones
Now put everything back following your zone plan. As you replace each item, think about frequency of use.
- Daily use items: eye level, front of shelves, easiest drawers
- Weekly use items: slightly higher, lower, or behind daily items
- Monthly or occasional use: upper cabinets, back of shelves, bottom drawers
Leave some empty space in each cabinet. A cabinet packed to 100 percent capacity is almost impossible to maintain. Items shift, things fall out, and the system breaks down within days. Aim for about 75 to 80 percent full so there is room to work within each space.
If multiple people use the kitchen, add labels to shelves, containers, and cabinet sections. Labels remove the ambiguity about where things belong and make it easy for everyone to put things back correctly.
Step 7: Organize the kitchen countertop
The countertop is the most valuable workspace in the kitchen and the most commonly cluttered. It should hold only what you use every single day.
What belongs on the counter:
- Coffee maker or kettle if used daily
- One or two most-used knives or a knife block
- A small dish or tray for keys and daily essentials, if needed
What does not belong on the counter:
- Appliances used less than once a week (toaster, blender, food processor, stand mixer)
- Mail, papers, chargers, and items with no clear home
- Decorative objects that block workspace
- Items stored on the counter because there is no cabinet space for them
A clear counter makes the kitchen feel larger, speeds up cleaning, and makes cooking noticeably easier. If clutter consistently returns to the counter, the real problem is usually insufficient or inefficient cabinet storage. Fix the cabinet organization before assuming the counter is the only option.
Step 8: Build habits that keep the kitchen organized
Even the best-organized kitchen will revert to clutter without consistent habits. Organization is a system, not a one-time event.
Two habits make the biggest difference:
The one-in, one-out rule: Every time a new item enters the kitchen, an old one leaves. This prevents gradual accumulation, which is the primary cause of kitchen disorganization over time.
The daily five-minute reset: At the end of each day, spend five minutes returning items to their designated places. When everything has a clear home, this takes almost no effort. It also means you never face a full reorganization project again.
If the kitchen consistently drifts back into disorder despite these habits, that is usually a sign the zone system does not match how the household actually cooks. Revisit the zone assignments and adjust them to reflect real behavior, not ideal behavior.
For a broader organization project across multiple rooms, our professional organizing service helps homeowners on Nantucket, Cape Cod, and Martha’s Vineyard create lasting systems for every area of the home.
Common mistakes when trying to organize the kitchen
These are the errors that consistently undermine kitchen organization:
- Buying organizers before decluttering: You end up with bins for items you should have discarded.
- Skipping the empty-everything step: Working around what is already there means the underlying clutter stays.
- Organizing by item type instead of workflow: Grouping all “small items” together regardless of use creates the same inefficiency as before.
- Filling cabinets to capacity: No empty space means no room to put things away easily.
- Ignoring the countertop: A tidy counter is part of an organized kitchen, not separate from it.
- Doing it all in one day and not maintaining it: Organization without maintenance habits lasts about two weeks.
Signs your kitchen needs to be reorganized
Watch for these signals that the system has drifted:
- Cabinet doors are hard to close
- Items regularly end up on the counter because there is no clear cabinet home
- You frequently cannot find a specific tool or ingredient
- Expired items turn up during meal prep
- Cooking feels more effortful than it should
- Duplicates appear because you bought something you already had but could not locate
Any of these signals mean a reset is due. A one-hour refresh using these same eight steps restores functionality quickly without a full start-from-scratch effort.
Frequently asked questions
How long does it take to organize the kitchen? A full kitchen organization, including decluttering, zoning, and putting everything back, typically takes three to five hours for a standard kitchen. Doing it in sections over two or three days is equally effective and less disruptive to daily cooking.
Where should I start when organizing the kitchen? Start with the area that causes the most daily frustration. For most people, that is the pantry, the utensil drawer, or the cabinet nearest the stove. Finishing one area completely before moving to the next builds momentum.
What is the most important step in organizing the kitchen? Decluttering. No storage solution compensates for too much stuff. Removing items you do not use is the single step that makes every other step easier and more effective.
How do I keep the kitchen organized long term? Two habits: the one-in, one-out rule for new items, and a daily five-minute reset to return things to their designated places. Consistency with these two habits prevents the need for full reorganizations.
What should I keep on the kitchen counter? Only what you use daily. Coffee maker, kettle, and one or two knives are reasonable. Everything else belongs in a cabinet or pantry. A clear counter is easier to clean and makes the kitchen more functional.
Should I organize the kitchen cabinet by cabinet or all at once? All at once is more effective because you see everything you own and can make better decisions about what to keep and where to store it. If that is too disruptive, work zone by zone, but complete each zone fully before moving to the next.
How often should I declutter the kitchen? A quick seasonal review every three to six months works well for most households. Check pantry expiration dates, reassess rarely used appliances, and do a brief reset of any areas that have drifted. A full reorganization is rarely needed more than once a year.
When is it worth hiring a professional organizer for the kitchen? When previous attempts have not stuck, when the space is significantly overfull, after a move or renovation, or simply when you want expert guidance to set up a system that will last. A professional can also see organizational opportunities that are easy to miss when you are close to the space.
A kitchen that works the way you cook
Learning how to organize the kitchen is less about perfection and more about function. The best kitchen organization system is the one that matches your actual habits, keeps your most-used items accessible, and makes putting things away easier than leaving them out.
These eight steps give you that system. Work through them in order, take the decluttering step seriously, and put the two daily habits in place. The kitchen that results from that process will stay organized without constant effort.
If you would rather have professional support, our professional organizing team at Quality Clean Service works with homeowners across Nantucket, Cape Cod, and Martha’s Vineyard to create kitchen and whole-home organization systems that last. And if a deep clean to go along with the new organization is on your list, our residential cleaning service can handle that at the same time.
