
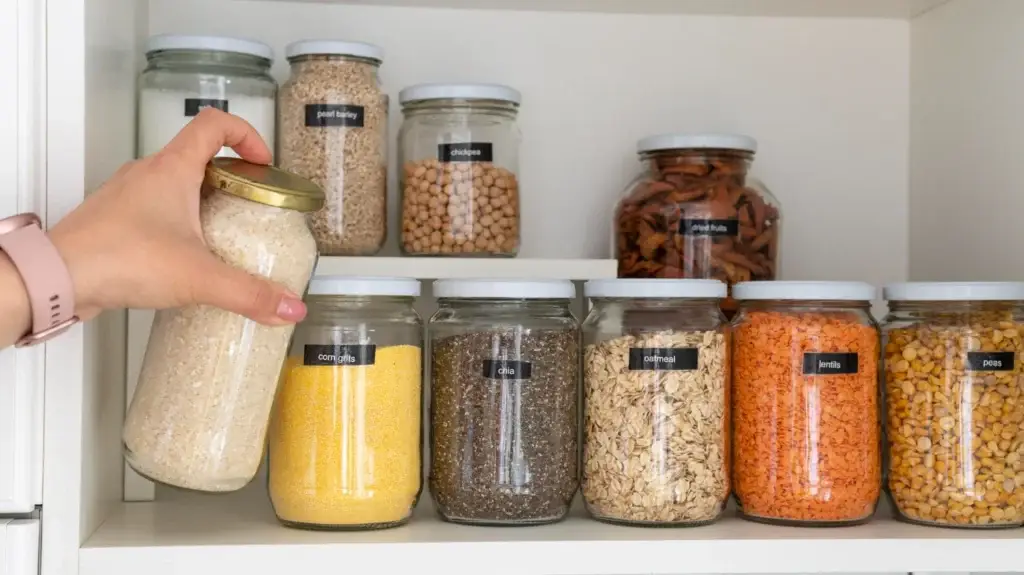
A small pantry can feel overwhelming quickly. Boxes stacked on top of each other, expired items buried in the back, and no clear system for finding what you need when you need it.
The good news is that pantry organization does not require a full renovation or a big budget. With the right approach, even the smallest pantry can become functional, tidy, and easy to maintain. Here are eight steps that actually work.
Why pantry organization makes such a difference
A disorganized pantry costs you more than just frustration. It leads to buying duplicates of things you already have, letting food expire before you use it, and wasting time searching for basic ingredients every time you cook.
An organized pantry, on the other hand, saves you money, reduces food waste, and makes cooking faster and more enjoyable. It also makes it easier for everyone in the household to put things away correctly, which means the system maintains itself with less effort.
Step 1: Empty the pantry completely
Before any organizing can happen, everything comes out. Remove every single item and place it on a counter or table where you can see it all at once.
This step is important for two reasons. First, it forces you to confront what you actually have. Second, it gives you a clean slate to work with, both literally and visually.
While everything is out, wipe down all shelves with a damp cloth and a mild cleaner. A clean surface is the foundation of a well-organized pantry.
Step 2: Sort and declutter ruthlessly
With everything out, go through each item one by one. Check expiration dates and discard anything that has expired. Set aside items you have not used in more than six months and decide whether you will realistically use them before they expire.
Create three groups:
- Keep: items you use regularly and are not expired
- Donate: non-expired items you will not use
- Discard: expired or opened items that are no longer safe to eat
This decluttering step is what most pantry organization guides skip, but it is what makes the difference between an organized pantry and an overcrowded one.
Step 3: Group items by category
Before putting anything back, organize your items into logical categories. Common groupings include:
- Grains and pasta
- Canned goods
- Baking supplies (flour, sugar, oils, leavening agents)
- Snacks and crackers
- Condiments and sauces
- Breakfast items (cereals, oatmeal, granola bars)
- Beverages (coffee, tea, drink mixes)
- Spices (if stored in the pantry)
- Pet food or household items if the pantry doubles as storage
Grouping items together makes the pantry organization easier to navigate and helps you see at a glance when you are running low on something.
Step 4: Measure your shelves and plan the layout
Before buying any organizers, measure your shelves. Note the height, width, and depth of each shelf. This prevents you from buying containers that do not fit.
Plan your layout based on how frequently you use different categories. Items you reach for daily should be at eye level or just below. Rarely used items can go on higher shelves. Heavy items like large bottles and cans should go on lower shelves where they are easier and safer to grab.
A professional kitchen pantry organizer in Nantucket, MA can help you design a layout that maximizes every inch of your available space.
Step 5: Choose the right storage containers
Clear containers are the most effective choice for pantry organization. They let you see contents at a glance without opening anything. Uniform container sizes also make shelves look tidy and use space more efficiently.
Useful container types include:
- Airtight canisters for flour, sugar, pasta, rice, and grains
- Clear bins for grouping smaller items like packets and snack bags
- Lazy Susans for condiments and sauces that are hard to reach at the back of shelves
- Pull-out baskets for canned goods
- Door organizers for spices, small jars, and bottles
You do not need to buy everything at once. Start with the categories that bother you most and add containers gradually.
Step 6: Label everything
Labels transform a pantry from organized to genuinely functional. When everything is labeled, every member of the household knows where things go, which means items actually get put back in the right place.
You can use a label maker for a clean, uniform look, or simple adhesive labels with a marker work just as well. Label both the container and the shelf space so items always return to the correct spot.
Labeling is especially important for pantries shared between multiple people or in vacation properties where different guests need to find things quickly.
Step 7: Use vertical space
Small pantries often have more vertical space available than horizontal space. Maximize it by adding shelf risers, stackable bins, or additional shelving units if the pantry has room.
Door space is also frequently wasted. An over-the-door organizer can hold spices, condiments, snacks, or cleaning supplies, effectively doubling your usable storage without expanding the pantry footprint.
Our professional pantry organizer service in Massachusetts helps clients maximize every available inch, including vertical space that is often overlooked.
Step 8: Maintain the system with a simple routine
An organized pantry stays organized only if there is a maintenance routine attached to it. A few small habits keep the system working long after the initial organization is complete:
- Put items back in their designated spot every time you use them
- Do a quick five-minute pantry check once a week to catch any items that drifted out of place
- Check expiration dates monthly and move older items to the front
- Restock containers when they run low instead of letting them empty completely
The kitchen organization service at Quality Clean Service includes guidance on how to maintain your newly organized space between professional visits.
When to call a professional pantry organizer
Some pantries benefit from a fresh perspective and professional expertise. Consider hiring a professional organizer when:
- You have tried to organize the pantry multiple times and the system never sticks
- The space has structural limitations like irregular shelf heights or poor depth
- You have a large volume of items and are not sure how to categorize them logically
- You are preparing a property for sale or rental and need it to look polished
Professional organizing services cover pantries, kitchens, closets, garages, and more. We work with homeowners across Nantucket and Cape Cod to create custom organizational systems that fit how they actually live.
For resources on food safety and pantry organization, the USDA’s FoodKeeper app is a helpful tool for understanding how long pantry items stay safe.
A pantry that works for you
Pantry organization is one of the highest-return home improvements you can make. It costs little, takes a weekend, and creates a lasting improvement to your daily routine.
Follow these eight steps, invest in the right containers, and build a simple maintenance habit. If you want professional support, Quality Clean Service is here to help. Contact us today for a free consultation on our pantry and kitchen organization service in Nantucket and Cape Cod.
